Contents: Overview of Cacti
In my last article we installed a Cacti Server, which is a web based network monitoring and graphing tool. Once the Cacti server is installed it needs to have target devices defined so that it can monitor and graph them. To do that I will use the SNMP v3 data collection method. SNMP v3 allows for Cacti to query target devices and get information about them in an encrypted format. Configuring SNMP v3 on Linux can be done with minimal steps but does require a few configuration files to be edited. Once SNMP v3 is install on Debian we can create an SNMP v3 user and password which Cacti will use to authenticate its connection to the device. Then we will configure Cacti to use SNMP v3, define a data source, and make a graph.
For this guide the "target device" is a base Debian 7 server that can be used to host any service.
The Cacti server is the same one use in the previous guide and only runs Cacti.
The steps outlined below can cause data loss. Do not run them on a production system without fully understanding the process and testing in a development environment.
These instructions are not meant to be exhaustive and may not be appropriate for your environment. Always check with your hardware and software vendors for the appropriate steps to manage your infrastructure.
Formatting:
Instructions and information are detailed in black font with no decoration.
Code and shell text are in black font, gray background, and a dashed border.
Input is green.
Literal keys are enclosed in brackets such as [enter], [shift], and [ctrl+c].
Input is green.
Literal keys are enclosed in brackets such as [enter], [shift], and [ctrl+c].
Warnings are in red font.
How to create an initial target device and graphs in Cacti
- Log in to your target device and launch a local shell prompt.
- Change your shell to run as root.
user@tester1~$: su -[enter]
Password:
root@tester1~$:
- Verify the system information.
root@tester1:~# uname -a[enter]
Linux tester1 3.2.0-4-amd64 #1 SMP Debian 3.2.57-3+deb7u2 x86_64 GNU/Linux
- Perform an update to the package database.
root@tester1:~# apt-get update[enter]Note that some data was removed for clarity.
Get:1 http://ftp.us.debian.org stable Release.gpg [1,655 B]
...
Hit http://ftp.us.debian.org wheezy-updates/main Translation-en/DiffIndex
Fetched 32.8 MB in 13s (2,409 kB/s)
Reading package lists... Done
- Install SNMP client and SNMP daemon.
root@tester1:~# apt-get install snmp snmpd[enter]Note that some data was removed for clarity. Allow the download and installation to take place.
Reading package lists... Done
Building dependency tree
Reading state information... Done
The following extra packages will be installed:
libclass-isa-perl libperl5.14 libsensors4 libsnmp-base libsnmp15 libswitch-perl perl perl-modules
Suggested packages:
lm-sensors snmp-mibs-downloader perl-doc libterm-readline-gnu-perl libterm-readline-perl-perl
libpod-plainer-perl
The following NEW packages will be installed:
libclass-isa-perl libperl5.14 libsensors4 libsnmp-base libsnmp15 libswitch-perl perl perl-modules snmp snmpd
0 upgraded, 10 newly installed, 0 to remove and 15 not upgraded.
Need to get 13.3 MB of archives.
After this operation, 39.8 MB of additional disk space will be used.
Do you want to continue [Y/n]? y[enter]
Get:1 http://ftp.us.debian.org/debian/ stable/main libsensors4 amd64 1:3.3.2-2+deb7u1 [55.0 kB]
Get:9 http://ftp.us.debian.org/debian/ stable/main snmp amd64 5.4.3~dfsg-2.8 [1,051 kB]
Get:10 http://ftp.us.debian.org/debian/ stable/main snmpd amd64 5.4.3~dfsg-2.8 [968 kB]
Fetched 13.3 MB in 3s (3,665 kB/s)
Preconfiguring packages ...
Selecting previously unselected package libsensors4:amd64.
(Reading database ... 30864 files and directories currently installed.)
Setting up snmp (5.4.3~dfsg-2.8) ...
Setting up snmpd (5.4.3~dfsg-2.8) ...
- Open the SNMP configuration file in a text editor.
root@tester1:~# vi /etc/snmp/snmpd.conf[enter]
- Change the agent to listen on the active IPv4 adapter.
# Listen for connections from the local system only
agentAddress udp:127.0.0.1:161
# Listen for connections on all interfaces (both IPv4 *and* IPv6)
#agentAddress udp:161,udp6:[::1]:161
Above is the default configuration and should be near the top of the file. Comment out the local only listener. Uncomment the IPv4 listener and delete the IPv6 listener. (Unless you are using IPv6). Below is what your configuration should look like:
# Listen for connections from the local system only
#agentAddress udp:127.0.0.1:161
# Listen for connections on all interfaces (both IPv4 *and* IPv6)
agentAddress udp:161
- Save the changes.
[esc][esc][shift+ZZ]
- Stop the SNMP service.
root@tester1:~# service snmpd stop[enter]
Stopping network management services: snmpd snmptrapd.
- Create an SNMP v3 user.
root@tester1:~# net-snmp-config --create-snmpv3-user -ro -A password123 cactiuser[enter]Make sure to change "password123" to what you want the password to be and "cactiuser" to what you want the username to be.
adding the following line to /var/lib/snmp/snmpd.conf:
createUser cactiuser MD5 "password123" DES
adding the following line to /usr/share/snmp/snmpd.conf:
rouser cactiuser
- Start the SNMP service.
root@tester1:~# service snmpd start[enter]
Starting network management services: snmpd.
- Log in to the Cacti server and launch a local shell prompt.
- Change your shell to run as root.
user@cacti~$: su -[enter]
Password:
root@cacti~$:
- Verify both the Cacti server and SNMP can reach the target device.
root@cacti~$: snmpwalk -u cactiuser -A password123 -a MD5 -l authnoPriv 10.1.10.195[enter]Note that data was removed for clarity.
iso.3.6.1.2.1.1.1.0 = STRING: "Linux tester1 3.2.0-4-amd64 #1 SMP Debian 3.2.57-3+deb7u2 x86_64"
iso.3.6.1.2.1.1.3.0 = Timeticks: (98743) 0:16:27.43
iso.3.6.1.2.1.1.5.0 = STRING: "tester1"
You should see many lines scroll across your screen containing information about the target device. snmpwalk is an SNMP client tool that queries SNMP targets and returns information.
-u cactiuser defines the security name, change cactiuser to the username defined in step 10.
-A password123 defines the authorization key, chance password123 to the password defined in step 10.
-a MD5 defines the authorization key hash protocol.
-l authnoPriv defines the security level used, here it says it requires authorization but no privilages.
10.1.10.195 is the IP address of the target device we want to monitor. Change to the IP or name of your target system.
If you get "snmpwalk: Timeout" then you make sure the snmpd service is running on the target (step 11).
If you get "snmpwalk: Authentication failure (incorrect password, community or key)" then the password defined after -A in the snmpwalk command is wrong. You created this at step 10
If you get "snmpwalk: Unknown user name" then the username defined after -u in the snmpwalk command is wrong. You created this at step 10.
If you get the authentication or username error and have verified the information used in step 10, go back to that step and pay attention to the order of the username and password.
- Open a graphical web browser and go to your Cacti server http://<IP>/cacti.
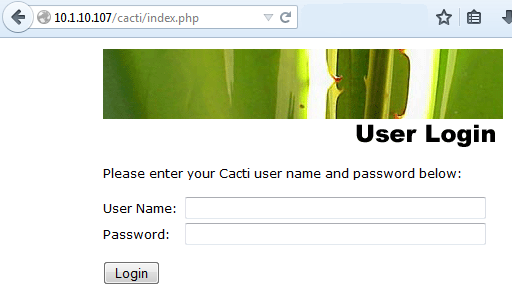
- Login with your administrator account.
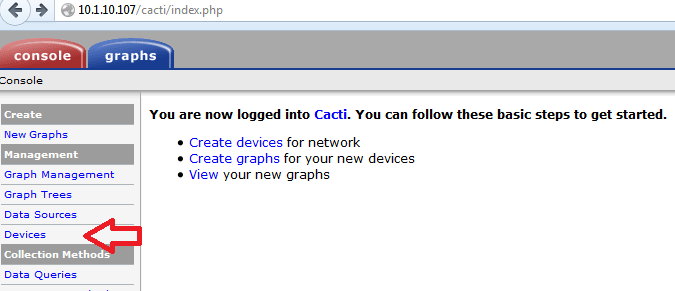
- On the left side, select "Devices".
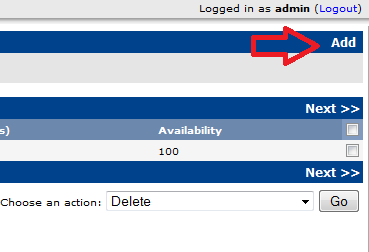
- On the far right side of the new page, select "Add".
- Fill in the required information and click create.
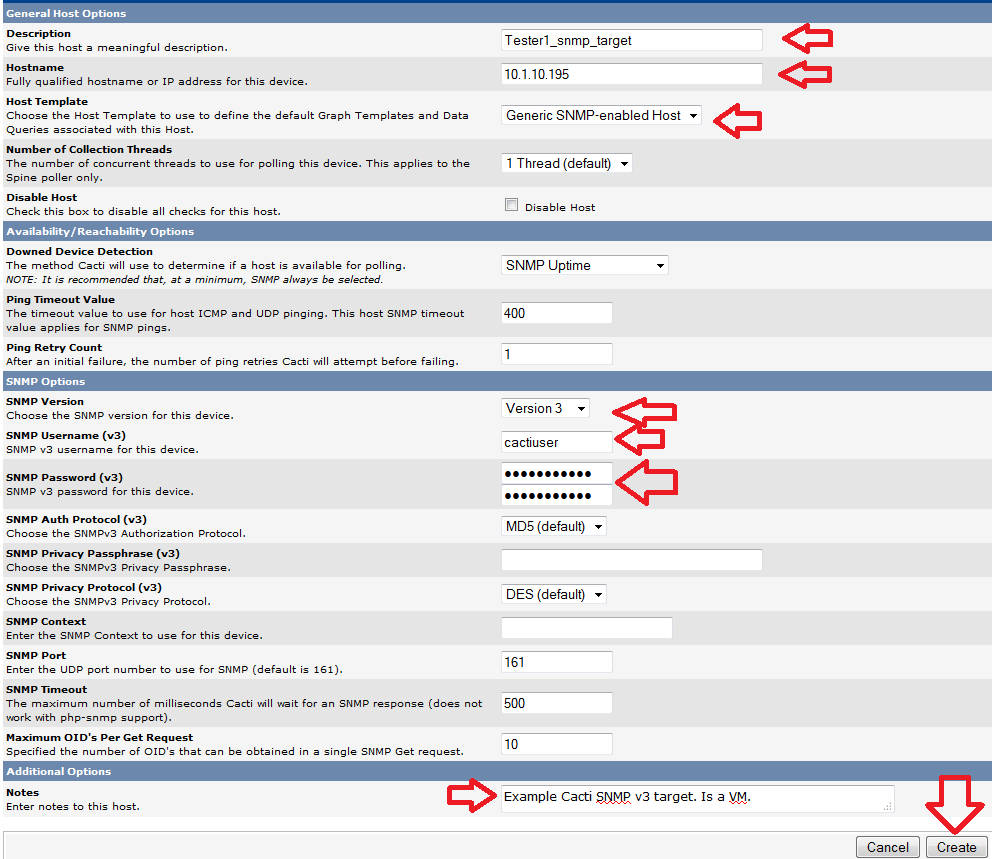
Give the host a description.
Type in the IP address or hostname of the device.
Change the host template to Generic SNMP enabled host.
Change the SNMP version to Version 3.
Type the SNMP username created in step 10.
Type and repeat the password for SNMP from step 10.
Enter any notes for the device.
Click Create.
- You will see a message that the save was successful. Cacti will do an SNMP request and display results if the information enter was correct.
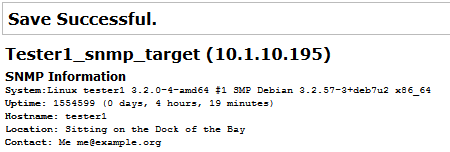
If there is no SNMP information or an error then you will need to resolve the connection issue, verify the information is correct (IP, username, password). - On the top right, click "Create Graphs for this Host".

- In the graph template drop down, select "Unix - Load Average" then click create.
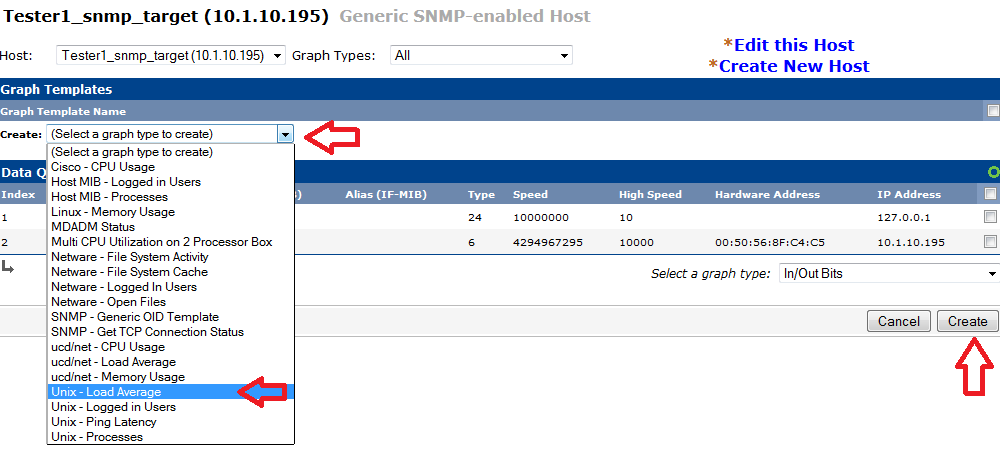
- A confirmation will be displayed at the top of the page.

- Select the check box next to eth0 and then click create.

- A confirmation will be displayed at the top of the page.

- On the top left click the "graphs" button and then on the top right click the preview view icon (looks like a mountain range).

- You may need to select the host in the host dropdown. The two graphs will show in the results area. If the graph names appear but there is no data you may need to wait at least 5 minutes for data to populate.
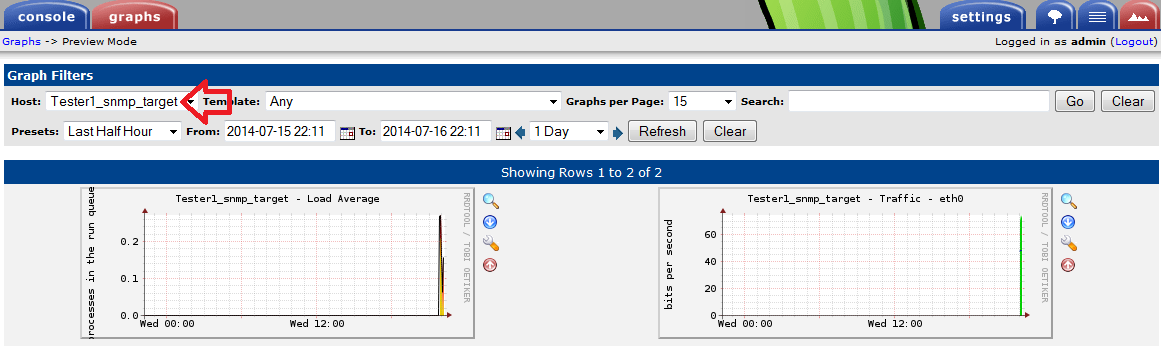
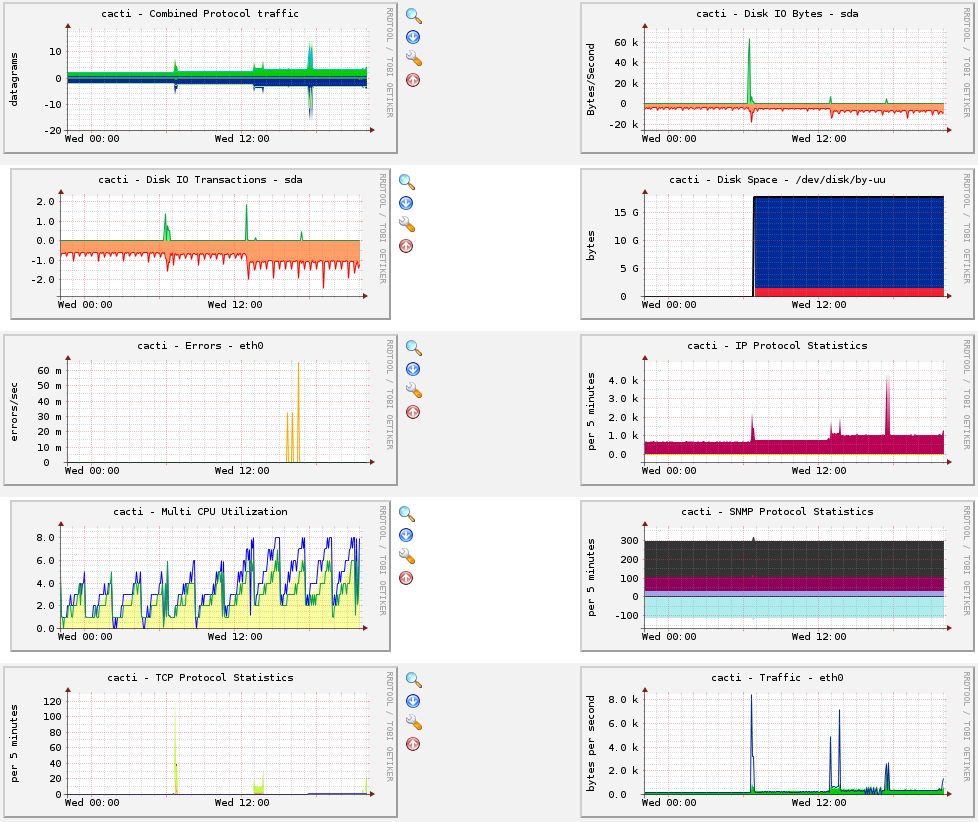
Cacti will by default only query devices every 5 minutes. It will take several cycles before useful information will appear. - You can return to the console and add more graphs and devices to monitor. Repeat the steps in this article to add many more devices. Here is an example of multiple graphs populated, the statistics are for my Cacti server.
Conclusion
After installing a Cacti server it is time to add devices and graphs so that Cacti can be useful. Following the above steps detailed how to enable SNMP v3 on a Linux system, verify SNMP v3 works from a remote target, how to add a device to Cacti, and how to generate default graphs. Cacti has many plugins, graph templates, and custom graphs that you can install. In future articles I will outline the steps for installing more popular graphs for monitoring your environment.
References
- http://docs.cacti.net/manual:088
- http://www.net-snmp.org/tutorial/tutorial-5/commands/snmpv3.html
- https://wiki.debian.org/SNMP
- http://www.snmp.com/snmpv3/snmpv3_intro.shtml
Written by Eric Wamsley
Posted: July 16th, 2014 10:19pm
Posted: July 16th, 2014 10:19pm